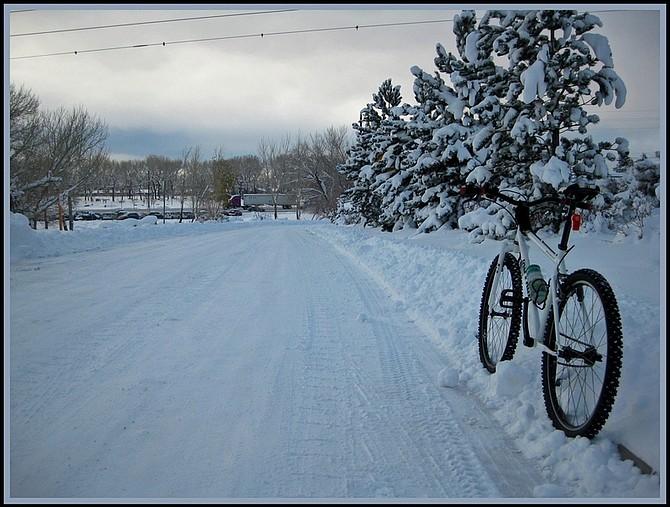
Jeff Moser/Submitted PhotoCommuting by bicycle can be difficult in winter months. However, with the proper gear, common sense, warm clothes and following some safety precautions, it can be a fun adventure.
Back in May during Bike to Work Week, our message was for anyone and everyone to get out and ride their bikes. And they did!
The weather was mild, and the days were long. It was the perfect weather for being outside. But now we're in December, and Northern Nevada has received some of the harshest weather we'll see all season.
We've had winter storm warnings, deep snow, ice, freezing temperatures below zero, and early darkness. This is hardly weather that conjures up images of cycling.
I'm not going to lie to you. Commuting during these conditions is not easy, and there will be times when you question your sanity. It's definitely not for everyone.
But if you are determined to ride your bike all year, or don't have any other options, I'd like to share some tips with you that will keep you safe, warm and rubber side down.
I'm going on my third winter of bicycle commuting, and I have learned much through trial and error. Often times the hard way. Sometimes painfully.
Having said this though, some of the most fun rides to work have been in the snow.
Here are a couple of lists I've put together of things that have helped me get through the toughest season of bicycle commuting.
Gear
• Bike. Mountain bikes work best for traveling over the loose, slippery and uneven terrain of winter roads. I like to use my single-speed mountain bike for riding in the snow and ice.
There are no suspension parts to ruin, the chain stays clean since there is no derailleur to drag in the snow, and there are fewer parts to get frozen or jammed.
Disc brakes are best, since the rim brakes tend to get iced up. I'm running rim brakes on my ice bike, but they get the job done well enough. I'm never going that fast anyway.
• Studded Snow Tires. This has been my first full season with studded snow tires, and I wonder how I survived as long as I did without them!
Studded tires don't help much in deep snow or slush, but they grip to ice and packed snow very well. With the added traction, you can traverse slippery tire ruts, cross icy parking lots and brake with confidence.
Crashing on the ice twice last winter got me to spend the money on studded tires. Studded tires range in price from $90 to $200 for a set.
I went with a set of tires from Continental that have tall, widely spaced knobbies, and 240 steel studs per tire. They transition between snow and ice nicely.
Riders in locations with very harsh winters lasting for months swear by Nokian studded tires. Their sharp carbide spikes are more durable than the cheaper steel studs of other tires.
Since we usually only need studded tires for a few weeks in December and January here in Carson City, I saved $50 on the set and went with a tire set with steel studs.
If you don't have studded snow tires, big knobby tires with deep, widely spaced knobs are your best bet. They won't help you on ice, but when aired down for maximum flotation and traction, do a good job in the snow.
Just be real careful when changing lines and turning, and give yourself plenty of time to stop! Seriously though, get some studded snow tires and you'll ride with confidence and be much safer!
• Flat Pedals. I took off my clipless pedals, and have been using a flat BMX style pedal with good results. They work good with my snow boots, and my response time is quicker when I need to put a foot down.
• Boots. While neoprene covered cycling shoes work decent for cold weather riding during normal conditions, I advise wearing boots during the ice and snow.
You won't gain a thing from a cycling shoe during these conditions, but you will gain a lot with a winter boot. Winter boots are generally waterproof, are much warmer than cycling shoes, and are easier to walk in (you will be walking at times).
I've been using Sorel Caribou snow boots for the snowiest and coldest days, and my KEEN waterproof hiking boot for the lighter days.
• Clothes. You will be tempted to overdress when it's below freezing, but after a mile of riding, you will be uncomfortably hot if overdressed.
Dress in layers, and shed a layer if you get too hot. For single-digit temperatures I wear my winter cycling pants or jeans over long underwear.
Ideally, I'd like to have waterproof over-pants for my work pants. Up top, I wear my work shirt, a fleece vest or jacket, and a wind and waterproof shell over the top.
I use waterproof mountaineering gloves with gauntlets that cover my forearms. They also have rubberized palms for griping the handlebars and controls.
There are a number of good winter cycling gloves available, just look for something warm and waterproof.
Warm handlebar covers are also an option if you don't like wearing bulky gloves. Neck gaiters or balaclavas are good for blocking wind and blowing snow from your neck and face.
Check your weather forecast, and be prepared for the evening weather as well as the morning weather. It's better to carry a few extra items with you than to not have them when you need them.
• Helmet. On my head I wear a thin skull cap under a Bern snowboarding helmet. Snowboarding helmets have less vents and are warmer and dryer during freezing temperatures or precipitation.
• Lights. These are the shortest days of the year, and you will most likely be riding in the dark one direction of your commute.
A bright, flashing red light is essential for the rear, and a light bright enough to see the terrain and alert oncoming traffic is needed for the front.
• Fenders. I don't use fenders on my ice bike, because everything is frozen in the morning on the way to work. There have been times when I've wanted them during the melting slush of the evenings though.
If you don't have fenders and are worried about getting wet, you can pack your work pants in your pack and change out of your cycling pants when you get to work.
Keep a few spare articles of clothing at work just in case.
Technique and Other Considerations
• Determine a Safe Route. Before you set out, determine if you have a safe route. Living closer to town is usually easier, as you generally have multiple options available. You can use the city grid of streets to customize your route and find the safest way possible. If you live along a lone, high-speed road on the outskirts of town, you may want to drive it first to asses the risks.
• Allow yourself more time. I can do my two-mile commute in nine minutes during the summer. On the worst days of winter, I need around 25 minutes to do this same two miles.
Even on the best days, I still need an additional five to eight minutes to make it on time. If you live far from work, doubling your commute time may not be practical.
• Pick roads with low speed limits. Although it is tempting to get out there on the freshly plowed main roads, this is where the traffic is fastest.
Even though the streets are plowed, the shoulders and sidewalks are usually buried in snow. There is generally not enough room to share the lane.
It's safer to find a quiet street, even if it is tougher to ride. By taking a side street, you may even have the whole road to yourself.
• Yield to Motorized Traffic. Every cyclist is familiar with the mantra Share the Road. When you're riding in the snow and ice though, it's best to ignore this advice and pull over for the cars when necessary.
Snowy roads are narrow, and many times, cars can't go around you due to the deep wheel ruts. Pull over, let traffic go by, then continue on your way.
• Vary Your Work Schedule. If you have the luxury, alter your work hours to take advantage of safer road conditions.
When the sun goes down, the temperature plummets and the roads ice up quickly.
Riding on wet roads at 4 p.m. is safer than riding on the ice in the darkness after 5 p.m.
• Explore New Routes. I quickly found that my standard route was too dangerous to ride in the snow.
I began trying new routes and found ways to avoid the busiest roads and dangerous intersections. You will also find that while one street may be torn up and slushy, the next street over may be easy-to-ride packed snow.
The conditions seem to change daily, so keep exploring!
• Read the Terrain. Look ahead and scan the road. Plan your strategy for keeping momentum through the snow and ice.
Which wheel rut will take you furthest down the road? Would a dry sidewalk be safer along a particularly dangerous section of road?
Watch for ice where you need to brake and turn. Is there ice at the stop sign? What speed can you carry through that icy turn?
Why Ride in the Snow and Ice?
I know the advice above may seem overly complicated, but during the winter months, your favorite mountain bike trails may be under snow.
Riding to work may be your only option to get some riding in, and is way more fun than riding a stationary trainer in your living room.
Riding in snow and ice uses a lot of upper body muscles to stay upright, and I find I get a pretty good workout just riding four miles.
Use these tips and techniques, and you'll get to ride your bike through the winter. You'll stay upright, warm, safe and have a lot of fun.
• To read more, go to bikecarson.com.

Comments
Use the comment form below to begin a discussion about this content.
Sign in to comment